- 파일 업로드를 이용해서 상품등록하는 게시판을 만들겠다.
- 우선 테이블을 만들겠다.
- go to mysql
- root에 들어가서 DB를 새로 만들겠다.
# 2021.10.13
create user 'product'@'localhost' identified by 'pass';
create database productdb;
grant all privileges on productdb.* to 'product'@'localhost';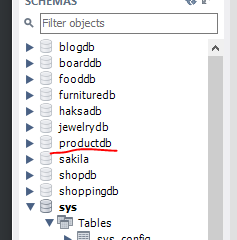
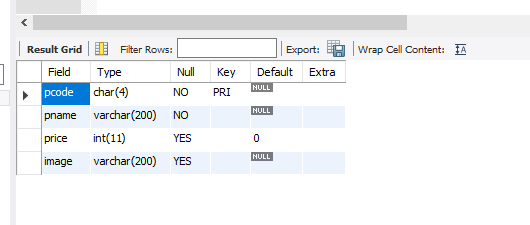
- 테이블 생성
#2021.10.13
create table tbl_product(
	pcode char(4) primary key not null,
    pname nvarchar(200) not null,
    price int default 0,
    image nvarchar(200)
);

desc tbl_product;
- 테이블에 데이터를 insert하겠다.
insert into tbl_product(pcode, pname, price, image)
values('P110', '[14k Gold] 스테디 원터치 링귀걸이', 99900, 'img01.jpg');
insert into tbl_product(pcode, pname, price, image)
values('P111', '[14kGold] 델리아 원터치 링귀걸이', 69900, 'img02.jpg');
insert into tbl_product(pcode, pname, price, image)
values('P112', '[925실버] 샤인모션 원터치 링귀걸이', 20900, 'img03.jpg');
insert into tbl_product(pcode, pname, price, image)
values('P113', '[925실버] 볼앤하트 원터치 링귀걸이', 17900, 'img04.jpg');
insert into tbl_product(pcode, pname, price, image)
values('P114', '[14kGold] 셔링 귀걸이', 49900, 'img05.jpg');
insert into tbl_product(pcode, pname, price, image)
values('P115', '[14kGold] 메르시 목걸이', 15900, 'img06.jpg');
insert into tbl_product(pcode, pname, price, image)
values('P116', '[925실버] 트윈 원터치 링귀걸이', 20800, 'img07.jpg');
insert into tbl_product(pcode, pname, price, image)
values('P117', '[14kGold] 한쪽 베이직 금볼 귀걸이', 7900, 'img08.jpg');
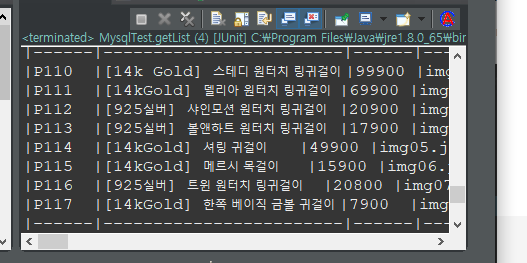
- 확인
select * from tbl_product order by pcode desc;
- 해당 경로에 다운받은 이미지 삽입 C:\data\product

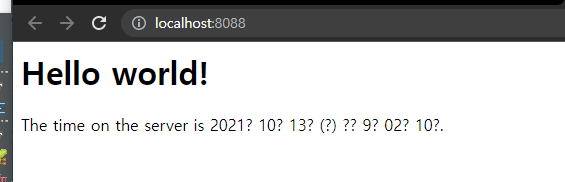
- 이제 프로젝트를 생성하겠다.
- setup 프로젝트를 복붙해서 ex07 프로젝트를 생성한다.
- 우선 디비 설정부터 해주겠다.
/ex07/src/main/webapp/WEB-INF/spring/root-context.xml
<?xml version="1.0" encoding="UTF-8"?>
<beans xmlns="http://www.springframework.org/schema/beans"
	xmlns:xsi="http://www.w3.org/2001/XMLSchema-instance"
	xmlns:context="http://www.springframework.org/schema/context"
	xmlns:tx="http://www.springframework.org/schema/tx"
	xsi:schemaLocation="http://www.springframework.org/schema/beans https://www.springframework.org/schema/beans/spring-beans.xsd
		http://www.springframework.org/schema/context http://www.springframework.org/schema/context/spring-context-4.1.xsd
		http://www.springframework.org/schema/tx http://www.springframework.org/schema/tx/spring-tx-4.1.xsd">
	<!-- DB 변경부 -->
	<bean id="dataSource"
		class="org.springframework.jdbc.datasource.DriverManagerDataSource">
		<property name="driverClassName" value="net.sf.log4jdbc.sql.jdbcapi.DriverSpy"></property>
		<property name="url" value="jdbc:log4jdbc:mysql://127.0.0.1:3306/productdb"></property>
		<property name="username" value="product"></property>
		<property name="password" value="pass"></property>
	</bean>
	<bean id="sqlSessionFactory" class="org.mybatis.spring.SqlSessionFactoryBean">
		<property name="dataSource" ref="dataSource" />
		<property name="mapperLocations" value="classpath:/mapper/**/*.xml" />
	</bean>
	<bean id="sqlSession" class="org.mybatis.spring.SqlSessionTemplate"
		destroy-method="clearCache">
		<constructor-arg name="sqlSessionFactory" ref="sqlSessionFactory"></constructor-arg>
	</bean>
	<context:component-scan base-package="com.example.mapper"></context:component-scan>
	<context:component-scan base-package="com.example.service"></context:component-scan>
	<bean id="transactionManager"
		class="org.springframework.jdbc.datasource.DataSourceTransactionManager">
		<property name="dataSource" ref="dataSource"></property>
	</bean>
	<tx:annotation-driven />
</beans>
- 업로드 path를 변경하겠다.
/ex07/src/main/webapp/WEB-INF/spring/appServlet/servlet-context.xml
.....
	<!-- 파일 업로드 path 변경부 -->
	<beans:bean id="uploadPath" class="java.lang.String">
		<beans:constructor-arg value="c:/data/product" />
	</beans:bean>
</beans:beans>
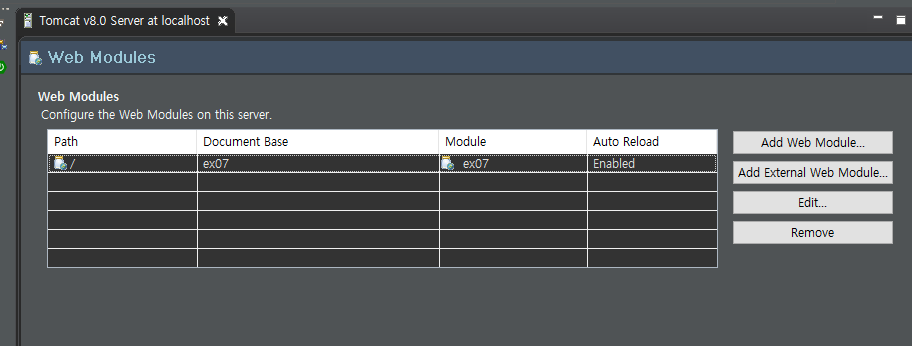
- 변경 후 서버 모듈을 설정해준다.
- ProductVO를 생성한다.
/ex07/src/main/java/com/example/domain/ProductVO.java
package com.example.domain;

public class ProductVO {
	private String pcode;
	private String pname;
	private int price;
	private String image;
    ... getter, setter, tostring
- MysqlMapper를 복사해서 ProductMapper를 만든다.
/ex07/src/main/resources/mapper/ProductMapper.xml
<?xml version="1.0" encoding="UTF-8"?>
<!DOCTYPE mapper PUBLIC "-//mybatis.org//DTD Mapper 3.0//EN" "http://mybatis.org/dtd/mybatis-3-mapper.dtd">
<mapper namespace="com.example.mapper.ProductMapper">
	<select id="list" resultType="com.example.domain.productVO">
		select * from tbl_product
</mapper>
- 인터페이스를 생성한다.
/ex07/src/main/java/com/example/mapper/ProductDAO.java
package com.example.mapper;

import java.util.List;

import com.example.domain.ProductVO;

public interface ProductDAO {
	public List<ProductVO> list();
}
- 구현체를 생성한다.
/ex07/src/main/java/com/example/mapper/ProductDAOImpl.java
package com.example.mapper;

import java.util.List;

import org.apache.ibatis.session.SqlSession;
import org.springframework.beans.factory.annotation.Autowired;
import org.springframework.stereotype.Repository;

import com.example.domain.ProductVO;

@Repository
public class ProductDAOImpl implements ProductDAO {
	@Autowired
	SqlSession session;

	String namespace="com.example.mapper.ProductDAO";

	@Override
	public List<ProductVO> list() {
		return session.selectList(namespace+".list");
	}

}
- 테스트
/ex07/src/test/java/com/example/controller/MysqlTest.java
package com.example.controller;

import org.junit.Test;
import org.junit.runner.RunWith;
import org.springframework.beans.factory.annotation.Autowired;
import org.springframework.test.context.ContextConfiguration;
import org.springframework.test.context.junit4.SpringJUnit4ClassRunner;

import com.example.mapper.MysqlMapper;
import com.example.mapper.ProductDAO;

@RunWith(SpringJUnit4ClassRunner.class) // 먼저 SpringJUnit4ClassRunner.class
										// import한다.
@ContextConfiguration(locations={"file:src/main/webapp/WEB-INF/spring/**/*.xml"})
public class MysqlTest {
	// 자동으로 연결
	@Autowired
	private ProductDAO dao;

	// 연결해서 getList을 테스트
	@Test
	public void getList() {
		dao.list();
	}
}
- 이제 CRUD작업을 DAO에 할 수 있도록 하겠다. 인터페이스라 메서드에 대한 형태의 갖춰주는게 가능하다.
/ex07/src/main/java/com/example/mapper/ProductDAO.java
package com.example.mapper;

import java.util.List;

import com.example.domain.ProductVO;

public interface ProductDAO {
	public List<ProductVO> list();
    //new
	public ProductVO read(String pcode);
	public void insert(ProductVO vo);
	public void update(ProductVO vo);
	public void delete(String pcode);
}
- SQL문을 작성하겠다.
/ex07/src/main/resources/mapper/ProductMapper.xml
<?xml version="1.0" encoding="UTF-8"?>
<!DOCTYPE mapper PUBLIC "-//mybatis.org//DTD Mapper 3.0//EN" "http://mybatis.org/dtd/mybatis-3-mapper.dtd">
<mapper namespace="com.example.mapper.ProductDAO">
	<!-- 테이블 데이터 불러오기 -->
	<select id="list" resultType="com.example.domain.ProductVO">
		select * from tbl_product;
	</select>
	<!-- 특정 값 불러오기 -->
	<select id="read" resultType="com.example.domain.ProductVO">
		select * from tbl_product
		where pcode=#{pcode}
	</select>
	<!-- insert -->
	<insert id="insert">
		insert into tbl_product(pcode,pname,price,image)
		values(#{pcode),#{pname},#{price},#{image})
	</insert>
	<!-- update -->
	<update id="update">
		update tbl_product set pname=#{pname}, price=#{price}, image=#{image}
		where pcode=#{pcode}
	</update>
	<!-- delete -->
	<delete id="delete">
		delete from tbl_product
		where pcode=#{pcode}
	</delete>
</mapper>

// 비교요망
<?xml version="1.0" encoding="UTF-8"?>
<!DOCTYPE mapper PUBLIC "-//mybatis.org//DTD Mapper 3.0//EN" "http://mybatis.org/dtd/mybatis-3-mapper.dtd">
<mapper namespace="com.example.mapper.ProductDAO">
	<select id="list" resultType="com.example.domain.ProductVO">
		select * from tbl_product;
	</select>
	<select id="read" resultType="com.example.domain.ProductVO">
		select * from tbl_product
		where pcode=#{pcode}
	</select>
	<insert id="insert">
		insert into tbl_product(pcode,pname,price,image)
		values(#{pcode}, #{pname}, #{price}, #{image})
	</insert>
	<update id="update">
		update tbl_product set pname=#{pname},price=#{price},image=#{image}
		where pcode=#{pcode}
	</update>
	<delete id="delete">
		delete from tbl_product
		where pcode=#{pcode}
	</delete>
</mapper>
/ex07/src/main/java/com/example/mapper/ProductDAOImpl.java
package com.example.mapper;

import java.util.List;

import org.apache.ibatis.session.SqlSession;
import org.springframework.beans.factory.annotation.Autowired;
import org.springframework.stereotype.Repository;

import com.example.domain.ProductVO;

@Repository
public class ProductDAOImpl implements ProductDAO {
	@Autowired
	SqlSession session;

	String namespace="com.example.mapper.ProductDAO";

	@Override
	public List<ProductVO> list() {
		return session.selectList(namespace+".list");
	}

	@Override
	public ProductVO read(String pcode) {
		return session.selectOne(namespace+".read",pcode);
	}

	@Override
	public void insert(ProductVO vo) {
		session.insert(namespace+".insert",vo);
	}

	@Override
	public void update(ProductVO vo) {
		session.update(namespace+".update",vo);
	}

	@Override
	public void delete(String pcode) {
		session.delete(namespace+".delete",pcode);
	}

}
- 이제 컨트롤러를 만들겠다. 기존에 있던 홈컨트롤러를 이용하자.
/ex07/src/main/java/com/example/controller/HomeController.java
package com.example.controller;

import java.text.DateFormat;
import java.util.Date;
import java.util.Locale;

import org.slf4j.Logger;
import org.slf4j.LoggerFactory;
import org.springframework.stereotype.Controller;
import org.springframework.ui.Model;
import org.springframework.web.bind.annotation.RequestMapping;
import org.springframework.web.bind.annotation.RequestMethod;

@Controller
public class HomeController {

	@RequestMapping(value = "/", method = RequestMethod.GET)
	public String home(Locale locale, Model model) {
		return "home";
	}
}
- 이전에 사용했던 CSS
/ex07/src/main/webapp/resources/home.css
@CHARSET "UTF-8";

@font-face {
	font-family: 'SpoqaHanSansNeo-Regular';
	src:
		url('https://cdn.jsdelivr.net/gh/projectnoonnu/noonfonts_2108@1.1/SpoqaHanSansNeo-Regular.woff')
		format('woff');
	font-weight: normal;
	font-style: normal;
}

body {
	font-family: 'SpoqaHanSansNeo-Regular';
}

#page {
	width: 960px;
	padding: 20px;
	margin: 0px auto;
}

#header {
	width: auto;
	padding: 10px;
	margin-bottom: 20px;
	text-align: center;
}

#center {
	width: auto;
	border: 1px solid black;
	padding: 10px;
	margin-bottom: 20px;
}

#content {
	text-align: center
}

#footer {
	width: auto;
	border: 1px solid black;
	padding: 10px;
	text-align: center;
}

#menu a:nth-child(n) {
	text-decoration: none;
	padding: 10px 20px 10px 20px;
}

#menu a:visited {
	color: black;
}

.pagination {
	display: inline-block;
	margin-top: 20px;
}

.pagination a {
	color: black;
	float: left;
	padding: 8px 16px;
	text-decoration: none;
}

.pagination a.active {
	background-color: #4CAF50;
	color: white;
}

.pagination a:hover {
	background: gray;
	color: white;
}

h1 {
	text-align: center;
}

table {
	border-collapse: collapse;
	margin: 0px auto;
}

td {
	border: 1px solid gray;
}

.title {
	background: gray;
	color: white;
	text-align: center;
}

.row:hover {
	cursor: pointer;
	background: gray;
	color: white;
}

.btn {
	text-align: center;
}
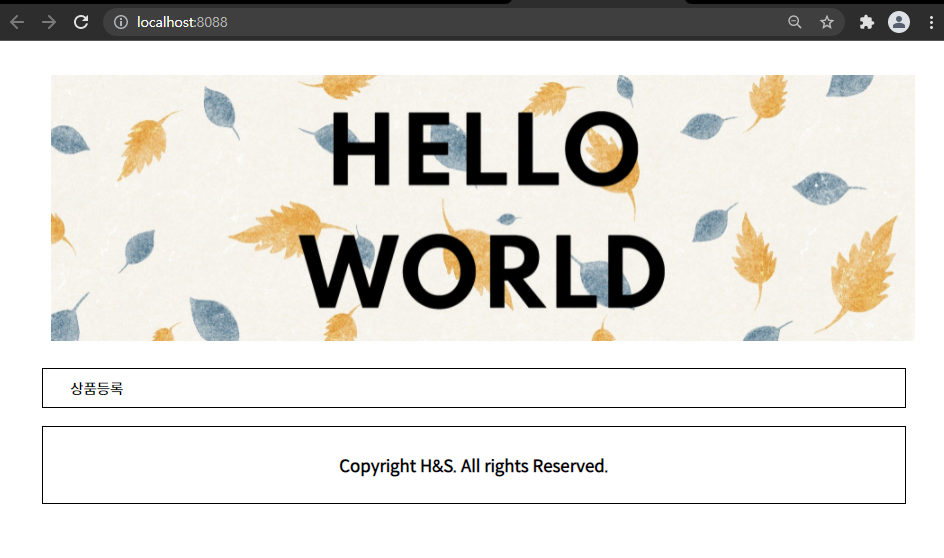
- 뷰를 수정한다.
/ex07/src/main/webapp/WEB-INF/views/home.jsp
<%@ taglib uri="http://java.sun.com/jsp/jstl/core" prefix="c"%>
<%@ page session="false"%>
<%@ page language="java" contentType="text/html; charset=UTF-8"
	pageEncoding="UTF-8"%>
<html>
<head>
<title>Home & Shopping</title>
<link rel="stylesheet" href="/resources/home.css" />
<script src="http://code.jquery.com/jquery-3.1.1.min.js"></script>
<script
	src="https://cdnjs.cloudflare.com/ajax/libs/handlebars.js/3.0.1/handlebars.js"></script>
</head>
<body>
	<div id="page">
		<div id="header">
			<img src="/resources/back.png" width=960 />
		</div>
		<div id="center">
			<div id="menu">
				<a href="">상품등록</a>
			</div>
			<div id="content">
				<jsp:include page="${pageName}"></jsp:include>
			</div>
		</div>
		<div id="footer">
			<h3>Copyright H&S. All rights Reserved.</h3>
		</div>
	</div>
</body>
</html>
- 이제 메인페이지에 상품목록을 출력하도록 하겠다
- 목록을 출력하는 페이지를 만들기 이전에 컨트롤러를 만들겠다.
- 홈컨트롤러를 이용해서 출력하겠다.
package com.example.controller;

import java.text.DateFormat;
import java.util.Date;
import java.util.Locale;

import org.slf4j.Logger;
import org.slf4j.LoggerFactory;
import org.springframework.stereotype.Controller;
import org.springframework.ui.Model;
import org.springframework.web.bind.annotation.RequestMapping;
import org.springframework.web.bind.annotation.RequestMethod;

@Controller
public class HomeController {

	@RequestMapping(value = "/", method = RequestMethod.GET)
	public String home(Locale locale, Model model) {
		model.addAttribute("pageName", "list.jsp");
		return "home";
	}
}
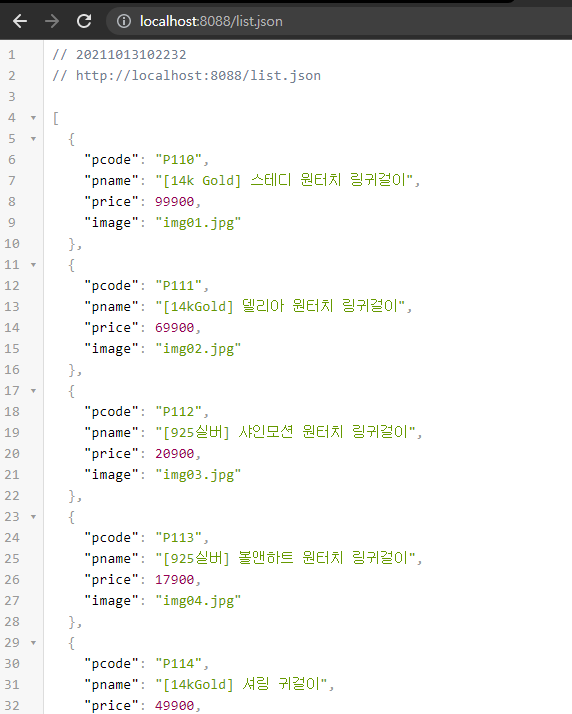
- json 데이터 형태로 가지고 오겠다.
/ex07/src/main/java/com/example/controller/ProductController.java
package com.example.controller;

import java.util.List;

import org.springframework.beans.factory.annotation.Autowired;
import org.springframework.stereotype.Controller;
import org.springframework.web.bind.annotation.RequestMapping;
import org.springframework.web.bind.annotation.ResponseBody;

import com.example.domain.ProductVO;
import com.example.mapper.ProductDAO;

@Controller
public class ProductController {

	@Autowired
	ProductDAO dao;

	@RequestMapping("/list.json")
	@ResponseBody
	public List<ProductVO> listJson(){
		return dao.list();
	}
}
- 페이지를 만들겠다.
/ex07/src/main/webapp/WEB-INF/views/list.jsp
<%@ page language="java" contentType="text/html; charset=UTF-8"
    pageEncoding="UTF-8"%>
<h1>[상품 목록]</h1>
- 이미지를 가지고 올 수 있도록 하겠다.
/ex07/src/main/java/com/example/controller/ProductController.java
package com.example.controller;

import java.io.File;
import java.io.FileInputStream;
import java.nio.file.Files;
import java.util.List;

import javax.annotation.Resource;

import org.apache.commons.io.IOUtils;
import org.springframework.beans.factory.annotation.Autowired;
import org.springframework.http.HttpHeaders;
import org.springframework.http.HttpStatus;
import org.springframework.http.ResponseEntity;
import org.springframework.stereotype.Controller;
import org.springframework.util.FileCopyUtils;
import org.springframework.web.bind.annotation.RequestMapping;
import org.springframework.web.bind.annotation.ResponseBody;

import com.example.domain.ProductVO;
import com.example.mapper.ProductDAO;

@Controller
public class ProductController {
	@Autowired
	ProductDAO dao;

	// 파일 저장 루트 지정
	@Resource(name = "uploadPath")
	private String path;

	@RequestMapping("/list.json")
	@ResponseBody
	public List<ProductVO> listJson() {
		return dao.list();
	}

	// 이미지파일 브라우저에 출력
	@RequestMapping("/display")
	@ResponseBody
	public ResponseEntity<byte[]> display(String fileName) throws Exception {
		ResponseEntity<byte[]> result = null;
		// display fileName이 있는 경우
		if (!fileName.equals("")) {
			File file = new File(path + File.separator + fileName);
			HttpHeaders header = new HttpHeaders();
			header.add("Content-Type", Files.probeContentType(file.toPath()));
			result = new ResponseEntity<>(FileCopyUtils.copyToByteArray(file), header, HttpStatus.OK);
		}
		return result;
	}

}

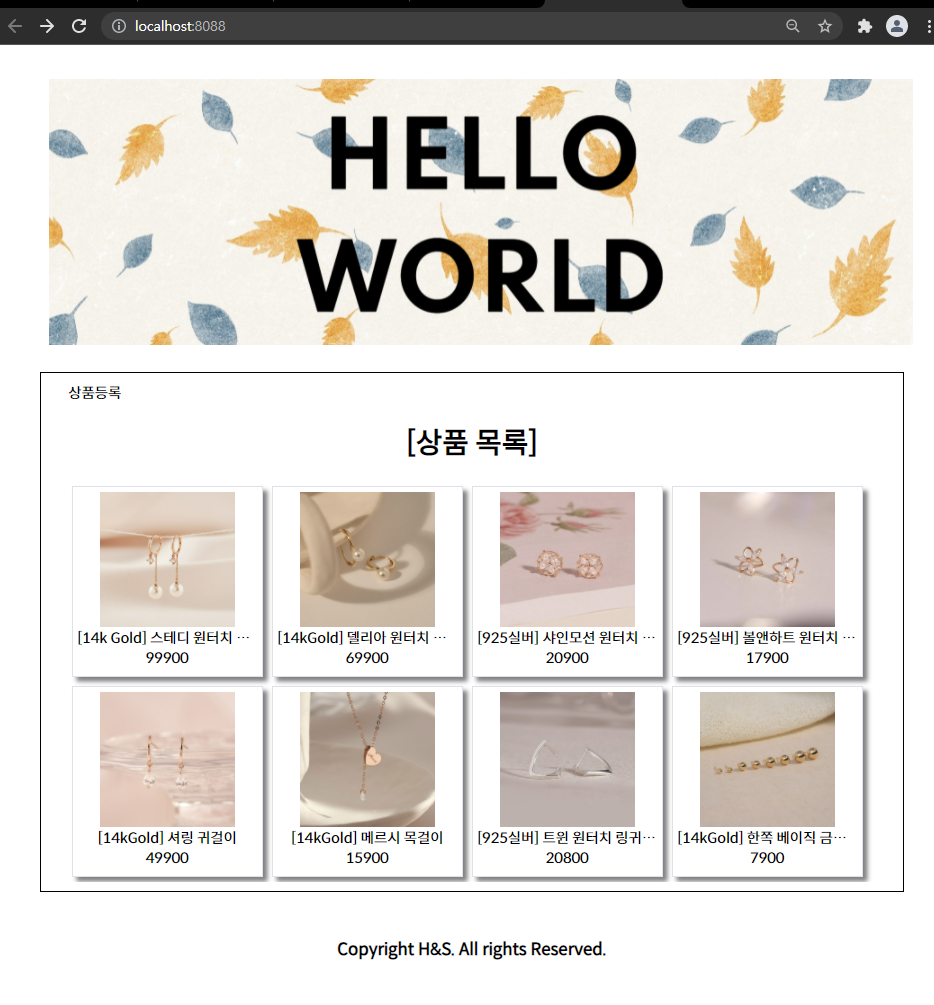
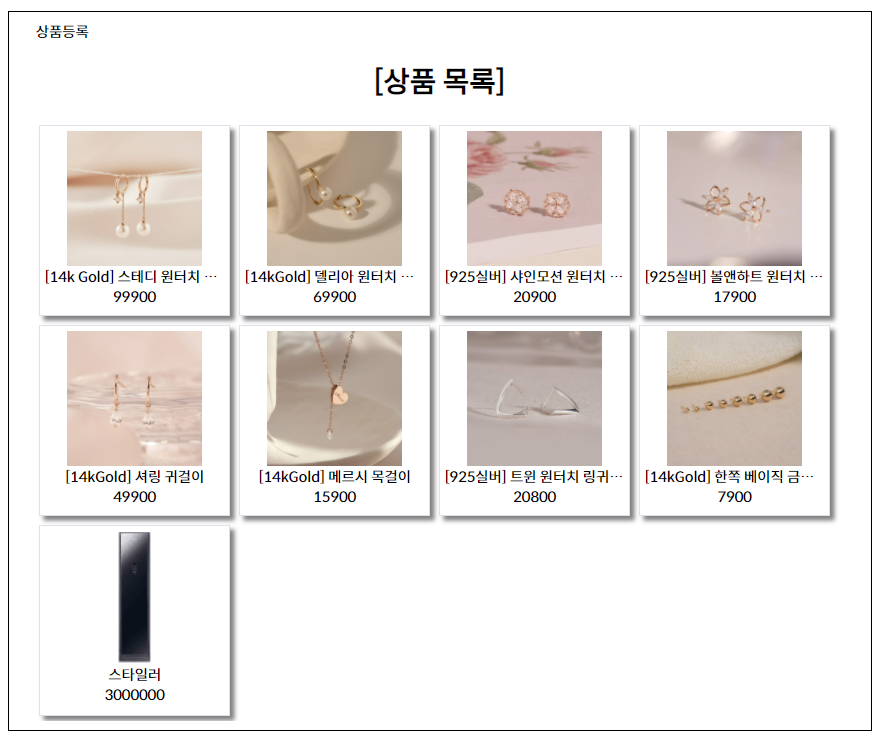
- 이제 탬플릿을 만들어서 목록을 출력해보도록 하겠다.
/ex07/src/main/webapp/WEB-INF/views/list.jsp
<%@ page language="java" contentType="text/html; charset=UTF-8"
	pageEncoding="UTF-8"%>
<style>
#products {
	margin : 0px auto;
	width: 900px;
	overflow: hidden;
}

.box {
	width: 200px;
	height:200px;
	float: left;
	border: 1px solid rgb(224, 224, 235);
	margin: 5px;
	padding: 5px;
	box-shadow:5px 5px 5px gray;
}
.pname{
	text-overflow:ellipsis;
	white-space:nowrap;
	overflow: hidden;
}
</style>
<h1>[상품 목록]</h1>
<div id="products"></div>
<script id="temp" type="text/x-handlebars-template">
	{{#each .}}
	<div class="box">
		<img src="/display?fileName={{image}}" width=150/>
		<div class="pname">{{pname}}</div>
		<div class="price">{{price}}</div>
	</div>
	{{/each}}
</script>
<script>
	getList();
	function getList() {
		$.ajax({
			type : 'get',
			url : '/list.json',
			dataType : 'json',
			success : function(data) {
				var temp = Handlebars.compile($('#temp').html());
				$('#products').html(temp(data));
			}
		});
	}
</script>
- 상품등록
- 컨트롤러 생성
/ex07/src/main/java/com/example/controller/ProductController.java
.....
	// 파일 저장 루트 지정
	@Resource(name = "uploadPath")
	private String path;

	@RequestMapping("/insert")
	public String insert(Model model) {
		model.addAttribute("pageName", "insert.jsp");
		return "home";
	}
.....
- 페이지 지정
/ex07/src/main/webapp/WEB-INF/views/home.jsp
.....
		<div id="header">
			<a href="/"><img src="/resources/back.png" width=960 /></a> // home으로
		</div>
		<div id="center">
			<div id="menu">
				<a href="/insert">상품등록</a> // insert로
			</div>
.....
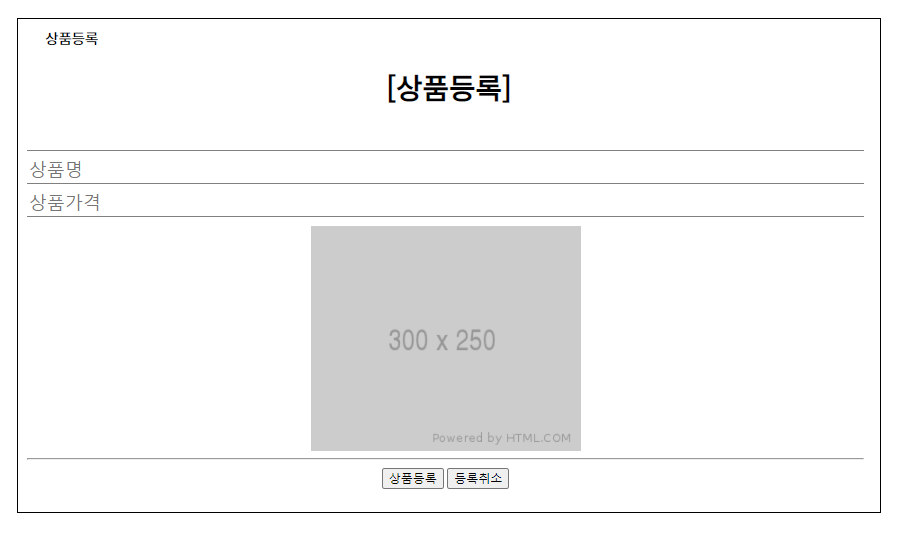
- 페이지 생성
/ex07/src/main/webapp/WEB-INF/views/insert.jsp
<%@ page language="java" contentType="text/html; charset=UTF-8"
    pageEncoding="UTF-8"%>
<style>
	form{
		width:930px;
	}
	input[type=text]{
		width:100%;
		margin-bottom: 10px;
		border:none;
		border-bottom: 1px solid gray;
		margin-bottom: 10px;
		font-size: 20px;
	}
</style>
<h1>[상품등록]</h1>
<form name="frm">
	<input type="text" name="pcode"/>
	<input type="text" name="pname" placeholder="상품명"/>
	<input type="text" name="price" placeholder="상품가격"/>
	<img src="http://placehold.it/300x250" id="image">
	<input type="file" name="image" style="display:none;"/>
	<hr/>
	<div>
		<input type="submit" value="상품등록"/>
		<input type="reset" value="등록취소"/>
	</div>
</form>
- 이미지 변경하거나 삽입시
/ex07/src/main/webapp/WEB-INF/views/insert.jsp
.....
<h1>[상품등록]</h1>
<form name="frm">
	<input type="text" name="pcode"/>
	<input type="text" name="pname" placeholder="상품명"/>
	<input type="text" name="price" value="0"/>
	<img src="http://placehold.it/300x250" id="image" width=300>
	<input type="file" name="file" style="display:none"/>
	<hr/>
	<div>
		<input type="submit" value="상품등록"/>
		<input type="reset" value="등록취소"/>
	</div>
</form>
<script>
	// 이미지 tag 클릭시
	$('#image').on("click",function(){
		$(frm.file).click();
	})

	// 이미지를 삽입하거나 변경시
	$(frm.file).on("change",function(e){
		var file=$(this)[0].files[0];
		$("#image").attr("src", URL.createObjectURL(file));
	})
</script>

- 상품 코드 가지고 오기
/ex07/src/main/resources/mapper/ProductMapper.xml
	<select id="maxCode" resultType="string">
		select max(pcode) from tbl_product
	</select>
/ex07/src/main/java/com/example/mapper/ProductDAO.java
	public String maxCode();
}
/ex07/src/main/java/com/example/mapper/ProductDAOImpl.java
	@Override
	public String maxCode() {
		return session.selectOne(namespace+".maxCode");
	}

}
/ex07/src/main/java/com/example/controller/ProductController.java
	// insert page
	@RequestMapping("/insert")
	public String insert(Model model) {
		// maxcode를 가지고 와서 최신 코드 입력
		String maxCode=dao.maxCode();
		String pcode = "P"+(Integer.parseInt(maxCode.substring(1))+1);
		model.addAttribute("pcode",pcode);
		model.addAttribute("pageName", "insert.jsp");
		return "home";
	}
/ex07/src/main/webapp/WEB-INF/views/insert.jsp
<form name="frm">
	<input type="text" name="pcode" value="${pcode}" readonly/>
	<input type="text" name="pname" placeholder="상품명"/>
	<input type="text" name="price" value="0"/>
	<img src="http://placehold.it/300x250" id="image" width=300>
	<input type="file" name="file" style="display:none"/>
	<hr/>
	<div>
		<input type="submit" value="상품등록"/>
		<input type="reset" value="등록취소"/>
	</div>
</form>
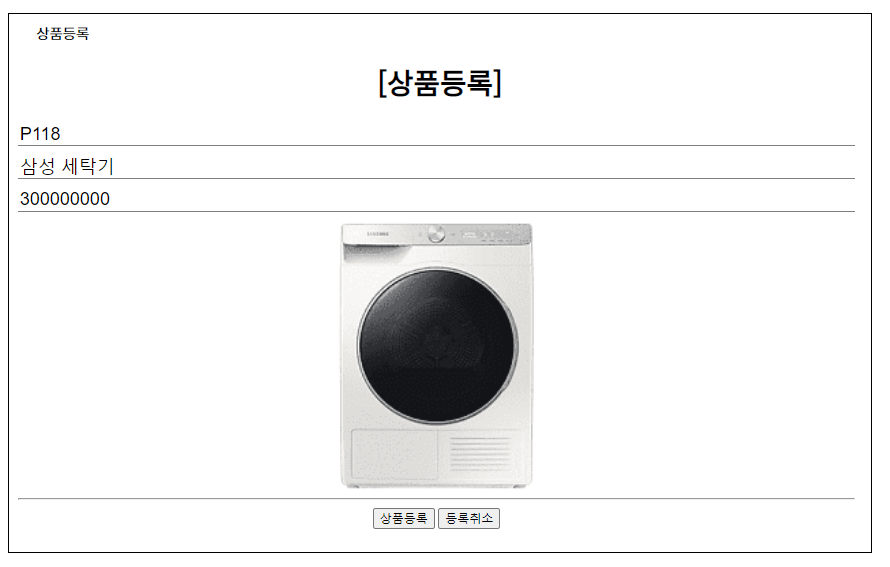
- 이제 상품 등록 버튼을 통해서 상품등록을 하겠다.
/ex07/src/main/webapp/WEB-INF/views/insert.jsp
.....
<h1>[상품등록]</h1>
<form name="frm" enctype="multipart/form-data">
	<input type="text" name="pcode" value="${pcode}" readonly/>
	<input type="text" name="pname" placeholder="상품명"/>
	<input type="text" name="price" value="0"/>
	<img src="http://placehold.it/300x250" id="image" width=300>
	<input type="file" name="file" style="display:none"/>
	<hr/>
	<div>
		<input type="submit" value="상품등록"/>
		<input type="reset" value="등록취소"/>
	</div>
</form>
<script>
	// 상품등록
	$(frm).on('submit',function(e){
		e.preventDefault();
		var pname=$(frm.pname).val();
		//var price=$(frm.price).val();
		var file=$(frm.file).val();
		if(pname=="" || file==""){
			alert("상품이름과 상품이미지를 입력하세요.");
			return;
		};
		if(!confirm("상품을 등록하시겠습니까?")) return;
		frm.action="insert";
		frm.method="post";
		frm.submit();
	})
.....
/ex07/src/main/java/com/example/controller/ProductController.java
.....
	// insert page
	@RequestMapping("/insert")
	public String insert(Model model) {
		// maxcode를 가지고 와서 최신 코드 입력
		String maxCode=dao.maxCode();
		String pcode = "P"+(Integer.parseInt(maxCode.substring(1))+1);
		model.addAttribute("pcode",pcode);
		model.addAttribute("pageName", "insert.jsp");
		return "home";
	}
	// new
	// submit 작동후 이곳으로
	@RequestMapping(value = "/insert", method = RequestMethod.POST)
	public String insertPost(ProductVO vo, MultipartHttpServletRequest multi) throws Exception {
		MultipartFile file = multi.getFile("file"); // 업로드한 파일 지정
		// 파일 이름 유니크하게
		String image = System.currentTimeMillis() + "_" + file.getOriginalFilename();
		vo.setImage(image);
		// 파일 업로드 하기
		file.transferTo(new File(path + "/" + image));
		// 데이터 입력
		dao.insert(vo);
		return "redirect:/";
	}
.....
- box를 클릭하여 상품정보를 보여주는 페이지를 만들어보겠다.
/ex07/src/main/java/com/example/controller/ProductController.java
.....
	// 파일 저장 루트 지정
	@Resource(name = "uploadPath")
	private String path;
	// new
	// read page
	@RequestMapping("/read")
	public String read(Model model, String pcode){
		model.addAttribute("vo",dao.read(pcode));
		model.addAttribute("pageName","read.jsp");
		return "home";
	}
.....
- list page에서 이미지 클릭시 상품 정보로 이동
/ex07/src/main/webapp/WEB-INF/views/list.jsp
.....
<script id="temp" type="text/x-handlebars-template">
	{{#each .}}
	<div class="box">
		<img src="/display?fileName={{image}}" width=150
		onClick="location.href='read?pcode={{pcode}}'"/>
		<div class="pname">{{pname}}</div>
		<div class="price">{{price}}</div>
	</div>
	{{/each}}
</script>
.....
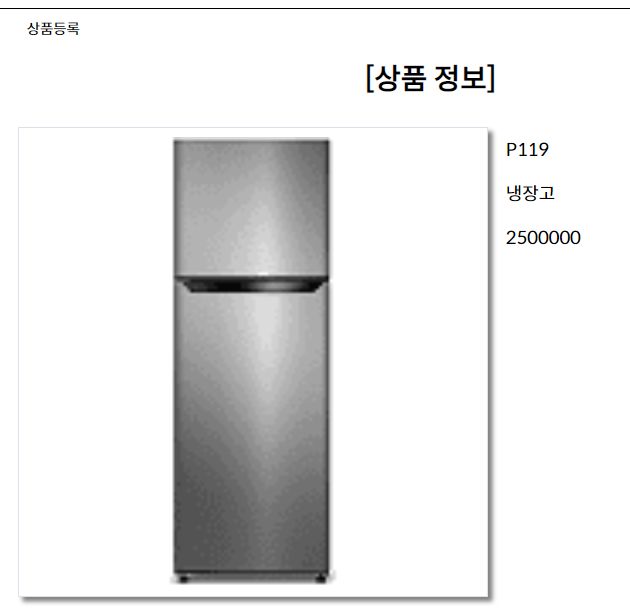
- read page
/ex07/src/main/webapp/WEB-INF/views/read.jsp
<%@ page language="java" contentType="text/html; charset=UTF-8"
	pageEncoding="UTF-8"%>
<style>
#product {
	overflow: hidden;
}

.image {
	float: left;
	border: 1px solid rgb(224, 224, 235);
	box-shadow: 5px 5px 5px gray;
	margin: 10px;
	margin-right: 20px;
	padding: 10px;
}

.info {
	float: left;
	font-size: 20px;
	text-align: left;
}
</style>
<h1>[상품 정보]</h1>
<div>
	<div id="product">
		<div class="image">
			<img src="/display?fileName=${vo.image}" width=500 />
		</div>
		<div class="info">
			<p class="pcode">${vo.pcode }</p>
			<p class="pname">${vo.pname }</p>
			<p class="price">${vo.price }</p>
		</div>
	</div>
</div>
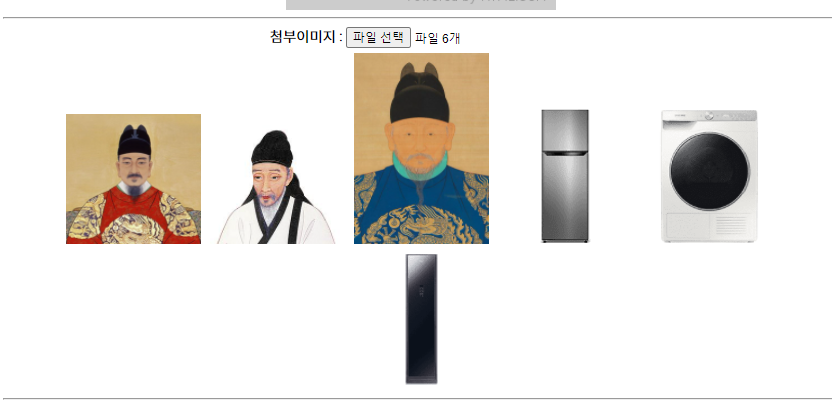
- 첨부이미지를 미리보기 하겠다.
/ex07/src/main/webapp/WEB-INF/views/insert.jsp
.....
<h1>[상품등록]</h1>
<form name="frm" enctype="multipart/form-data">
	<input type="text" name="pcode" value="${pcode}" readonly/>
	<input type="text" name="pname" placeholder="상품명"/>
	<input type="text" name="price" value="0"/>
	<img src="http://placehold.it/300x250" id="image" width=300>
	<input type="file" name="file" style="display:none"/>
	<hr/>
	<div>첨부이미지 : <input type="file" name="files" acceept="image/*" multiple/></div>
	<div id="files"></div>
	<hr/>
	<div>
		<input type="submit" value="상품등록"/>
		<input type="reset" value="등록취소"/>
	</div>
</form>
<script>
	// 이미지 미리보기
	$(frm.files).on("change",function(){
		var files=$(this)[0].files;
		var str="";
		$.each(files,function(index,file){
			str+="<img src='"+URL.createObjectURL(file)+"'/>"
		});
		$("#files").html(str);
	});
.....
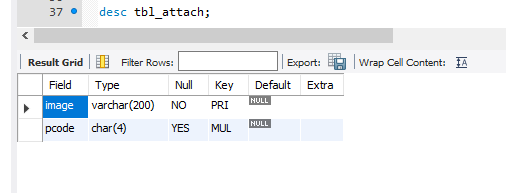
- 첨부한 이미지를 저장한 테이블을 만들겠다.
- go to mysql
create table tbl_attach(
	image nvarchar(200) primary key not null,
    pcode char(4),
    foreign key(pcode) references tbl_product(pcode)
);
- 상품등록할때 해당 테이블에 데이터를 넣어줄 수 있도록 하겠다.
/ex07/src/main/java/com/example/domain/ProductVO.java
.....
	// 멀티 이미지
	private ArrayList<String> images;
    // getter setter tostring
.....
- 첨부 이미지가 콘솔에 우선 출력되는지 확인하겠다.
/ex07/src/main/java/com/example/controller/ProductController.java
.....
	// submit 작동후 이곳으로
	@RequestMapping(value = "/insert", method = RequestMethod.POST)
	public String insertPost(ProductVO vo, MultipartHttpServletRequest multi) throws Exception {
		MultipartFile file = multi.getFile("file"); // 업로드한 파일 지정
		// 파일 이름 유니크하게
		String image = System.currentTimeMillis() + "_" + file.getOriginalFilename();
		vo.setImage(image);
		// 대표 파일 업로드 하기
		file.transferTo(new File(path + "/" + image));
		// 데이터 입력
		dao.insert(vo);
		// new
		// 첨부 파일 업로드 하기
		List<MultipartFile> files = multi.getFiles("files");
		ArrayList<String> images=new ArrayList<String>();
		for(MultipartFile attFile:files){
			if(!attFile.isEmpty()){
				String attImage=System.currentTimeMillis()+"_"+attFile.getOriginalFilename();
				images.add(attImage);
			}
		}
		vo.setImages(images);
		System.out.println(vo.toString());
		return "redirect:/";
	}
.....

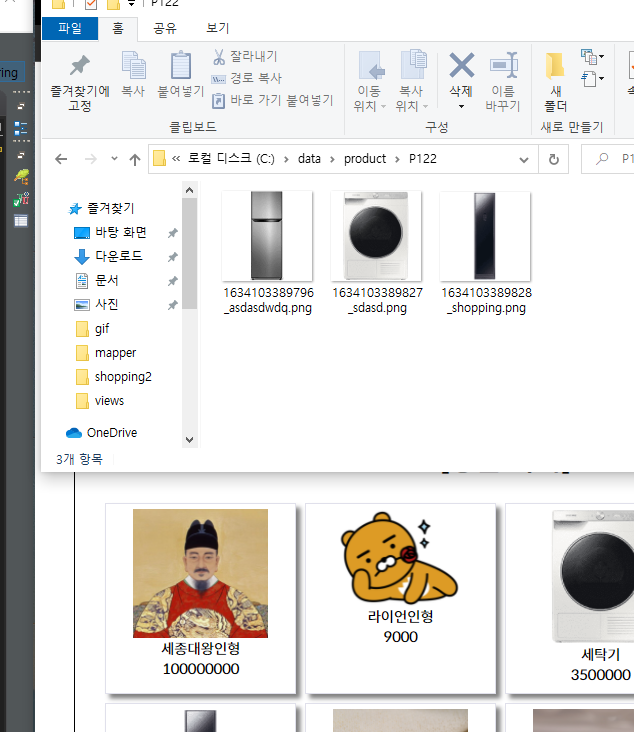
- 업로드시 첨부파일 폴더가 없으면 생성하고 해당 폴더에 업로드하겠다.
/ex07/src/main/java/com/example/controller/ProductController.java
.....
		// 첨부 파일 업로드 하기
		List<MultipartFile> files = multi.getFiles("files");
		ArrayList<String> images=new ArrayList<String>();
		for(MultipartFile attFile:files){
			if(!attFile.isEmpty()){
				String attImage=System.currentTimeMillis()+"_"+attFile.getOriginalFilename();
				images.add(attImage);
				// 새폴더 생성
				File folder = new File(path+"/"+vo.getPcode());
				if(!folder.exists()){
					folder.mkdir();
				}
				// 해당 폴더 업로드
				attFile.transferTo(new File(path+"/"+vo.getPcode()+"/"+attImage));
			}
		}
.....
- 이제 첨부파일용 mapper를 만들겠다.
/ex07/src/main/resources/mapper/AttachMapper.xml
<?xml version="1.0" encoding="UTF-8"?>
<!DOCTYPE mapper PUBLIC "-//mybatis.org//DTD Mapper 3.0//EN" "http://mybatis.org/dtd/mybatis-3-mapper.dtd">
<mapper namespace="com.example.mapper.AttachMapper">
	<insert id="insert">
		insert into tbl_attach(pcode,image)
		values(#{pcode},#{image})
	</insert>
</mapper>
/ex07/src/main/java/com/example/mapper/AttachDAO.java
package com.example.mapper;

public interface AttachDAO {
	public void insert(String image, String pcode);
}
/ex07/src/main/java/com/example/mapper/AttachDAOImpl.java
package com.example.mapper;

import java.util.HashMap;

import org.apache.ibatis.session.SqlSession;
import org.springframework.beans.factory.annotation.Autowired;
import org.springframework.stereotype.Repository;

@Repository
public class AttachDAOImpl implements AttachDAO {
	@Autowired
	SqlSession session;

	String namespace = "com.example.mapper.AttachMapper";

	@Override
	public void insert(String image, String pcode) {
		HashMap<String, Object> map = new HashMap<>();
		map.put("image", image);
		map.put("pcode", pcode);
		session.insert(namespace + ".insert", map);
	}

}
- 두가지 작업을 위한 서비스 생성
/ex07/src/main/java/com/example/service/ProductService.java
package com.example.service;

import com.example.domain.ProductVO;

public interface ProductService {
	public void insert(ProductVO vo);
}
/ex07/src/main/java/com/example/service/ProductServiceImpl.java
package com.example.service;

import java.util.ArrayList;

import org.springframework.beans.factory.annotation.Autowired;
import org.springframework.stereotype.Service;
import org.springframework.transaction.annotation.Transactional;

import com.example.domain.ProductVO;
import com.example.mapper.AttachDAO;
import com.example.mapper.ProductDAO;

@Service
public class ProductServiceImpl implements ProductService {
	@Autowired
	ProductDAO pdao;

	@Autowired
	AttachDAO adao;

	@Transactional
	@Override
	public void insert(ProductVO vo) {
		pdao.insert(vo);
		ArrayList<String> images=vo.getImages();
		for(String image:images){
			adao.insert(image, vo.getPcode());
		}
	}

}
/ex07/src/main/java/com/example/controller/ProductController.java
......
	@Autowired
	ProductService service;
......
	// submit 작동후 이곳으로
	@RequestMapping(value = "/insert", method = RequestMethod.POST)
	public String insertPost(ProductVO vo, MultipartHttpServletRequest multi) throws Exception {
		MultipartFile file = multi.getFile("file"); // 업로드한 파일 지정
		// 파일 이름 유니크하게
		String image = System.currentTimeMillis() + "_" + file.getOriginalFilename();
		vo.setImage(image);
		// 대표 파일 업로드 하기
		file.transferTo(new File(path + "/" + image));

		// 첨부 파일 업로드 하기
		List<MultipartFile> files = multi.getFiles("files");
		ArrayList<String> images=new ArrayList<String>();
		for(MultipartFile attFile:files){
			if(!attFile.isEmpty()){
				String attImage=System.currentTimeMillis()+"_"+attFile.getOriginalFilename();
				images.add(attImage);
				// 새폴더 생성
				File folder = new File(path+"/"+vo.getPcode());
				if(!folder.exists()){
					folder.mkdir();
				}
				// 해당 폴더 업로드
				attFile.transferTo(new File(path+"/"+vo.getPcode()+"/"+attImage));
			}
		}
		vo.setImages(images);
		// System.out.println(vo.toString());

        // new
		// 데이터 입력
		service.insert(vo);
		return "redirect:/";
	}
- 이제 첨부 이미지가 상품 정보 페이지에 출력될 수 있도록 하겠다.
/ex07/src/main/resources/mapper/AttachMapper.xml
.....
	<select id="list" resultType="string">
		select image from tbl_attach
		where pcode=#{pcode}
	</select>
</mapper>
/ex07/src/main/java/com/example/mapper/AttachDAO.java
.....
	public List<String> list(String pcode);
}
/ex07/src/main/java/com/example/mapper/AttachDAOImpl.java
.....
	@Override
	public List<String> list(String pcode) {
		return session.selectList(namespace+".list",pcode);
	}

}
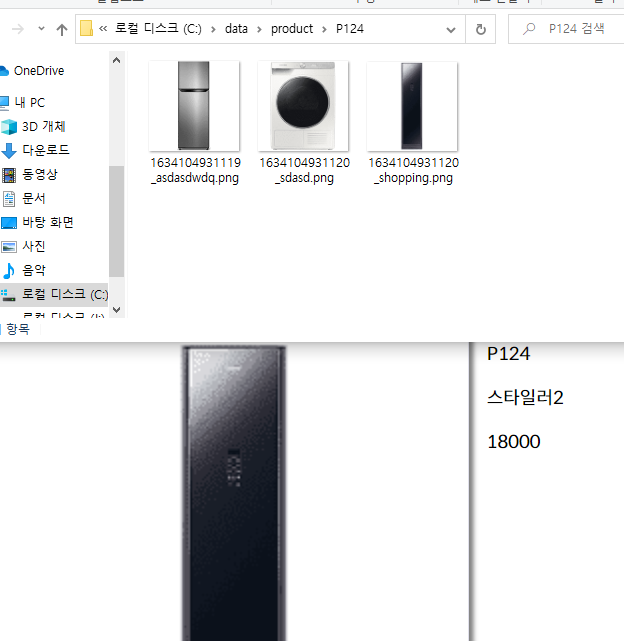
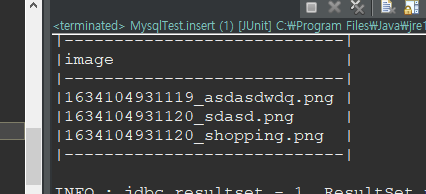
- test
/ex07/src/test/java/com/example/controller/MysqlTest.java
package com.example.controller;

import org.junit.Test;
import org.junit.runner.RunWith;
import org.springframework.beans.factory.annotation.Autowired;
import org.springframework.test.context.ContextConfiguration;
import org.springframework.test.context.junit4.SpringJUnit4ClassRunner;

import com.example.domain.ProductVO;
import com.example.mapper.AttachDAO;
import com.example.mapper.MysqlMapper;
import com.example.mapper.ProductDAO;

@RunWith(SpringJUnit4ClassRunner.class) // 먼저 SpringJUnit4ClassRunner.class
										// import한다.
@ContextConfiguration(locations={"file:src/main/webapp/WEB-INF/spring/**/*.xml"})
public class MysqlTest {
	// 자동으로 연결
	@Autowired
	private ProductDAO dao;

	@Autowired
	AttachDAO adao;

	// 연결해서 insert을 테스트
	@Test
	public void insert() {
		adao.list("P124");
	}
}
- 컨트롤러에서 read가기전에 데이터를 담아서 넘기겠다.
/ex07/src/main/java/com/example/controller/ProductController.java
.....
	@Autowired // new
	AttachDAO adao;

	// 파일 저장 루트 지정
	@Resource(name = "uploadPath")
	private String path;

	// read page
	@RequestMapping("/read")
	public String read(Model model, String pcode){
		model.addAttribute("attList", adao.list(pcode)); // new
		model.addAttribute("vo",dao.read(pcode));
		model.addAttribute("pageName","read.jsp");
		return "home";
	}
......
- 첨부 파일 업로드시 Path까지 넣어주도록 하겠다.
/ex07/src/main/java/com/example/controller/ProductController.java
....
// 첨부 파일 업로드 하기
		List<MultipartFile> files = multi.getFiles("files");
		ArrayList<String> images=new ArrayList<String>();
		for(MultipartFile attFile:files){
			if(!attFile.isEmpty()){
				String attImage=System.currentTimeMillis()+"_"+attFile.getOriginalFilename();
				images.add(vo.getPcode()+"/"+attImage); //// new new
				// 새폴더 생성
				File folder = new File(path+"/"+vo.getPcode());
				if(!folder.exists()){
					folder.mkdir();
				}
				// 해당 폴더 업로드
				attFile.transferTo(new File(path+"/"+vo.getPcode()+"/"+attImage));
			}
		}
		vo.setImages(images);
		// System.out.println(vo.toString());

		// 데이터 입력
		service.insert(vo);
		return "redirect:/";
	}
....
/ex07/src/main/webapp/WEB-INF/views/read.jsp
<%@ page language="java" contentType="text/html; charset=UTF-8"
pageEncoding="UTF-8"%>
<%@ taglib uri="http://java.sun.com/jsp/jstl/core" prefix="c"%>
<style>
#product {
overflow: hidden;
}
.image {
float: left;
border: 1px solid rgb(224, 224, 235);
box-shadow: 5px 5px 5px gray;
margin: 10px;
margin-right: 20px;
padding: 10px;
}
.info {
float: left;
font-size: 20px;
text-align: left;
}
</style>
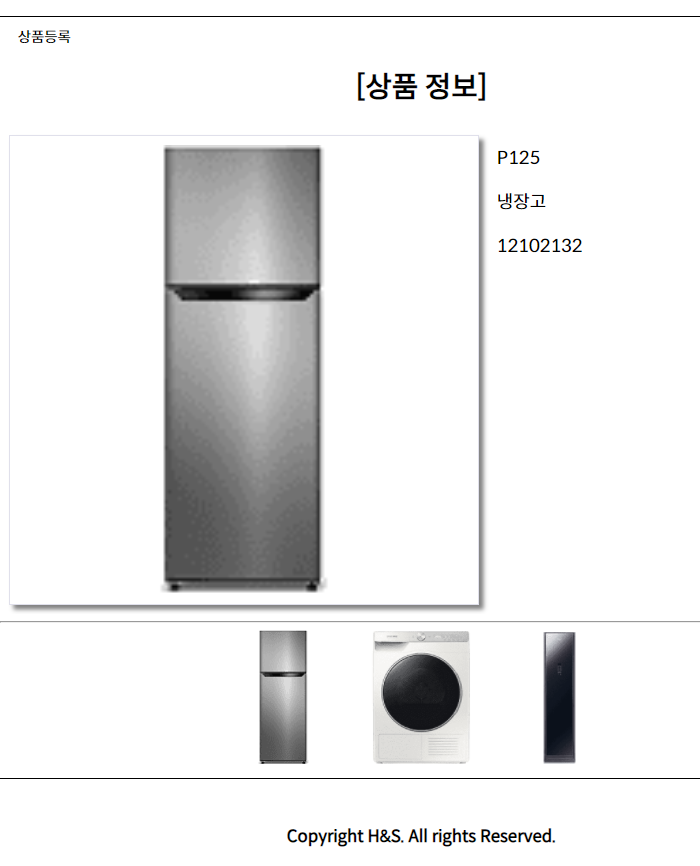
<h1>[상품 정보]</h1>
<div>
<div id="product">
<div class="image">
<img src="/display?fileName=${vo.image}" width=500 />
</div>
<div class="info">
<p class="pcode">${vo.pcode }</p>
<p class="pname">${vo.pname }</p>
<p class="price">${vo.price }</p>
</div>
</div>
<hr />
<div id="products">
<c:forEach items="${attList}" var="image">
<img src="/display?fileName=${image}" width=150 />
</c:forEach>
</div>
</div>
- 게시글을 삭제해보겠다.
	<delete id="delete">
		delete from tbl_attach
		where image=#{image}
	</delete>
</mapper>
/ex07/src/main/java/com/example/mapper/AttachDAO.java
	public void delete(String image);
}
/ex07/src/main/java/com/example/mapper/AttachDAOImpl.java
	@Override
	public void delete(String image) {
		session.delete(namespace + ".delete", image);
	}

}
/ex07/src/main/java/com/example/controller/ProductController.java
.....
	// 파일 저장 루트 지정
	@Resource(name = "uploadPath")
	private String path;
	// new
	// 첨부파일 삭제
	@RequestMapping("/attDelete")
	@ResponseBody
	public void attDelete(String image){
		adao.delete(image); // 테이블 삭제
		new File(path+"/"+image).delete(); // 디스크에서 삭제
	}
.....
/ex07/src/main/webapp/WEB-INF/views/read.jsp
.....
<div id="products">
		<c:forEach items="${attList}" var="image">
			<div>
				<img src="/display?fileName=${image}" width=150 />
				<a href="${image}">삭제</a>
			</div>
		</c:forEach>
	</div>
</div>

<script>
	$("#products").on("click","a",function(e){
		e.preventDefault();
		var img=$(this).parent();
		var image=$(this).attr("href");
		if(!confirm("해당 파일을 삭제하시겠습니까?")) return
		$.ajax({
			type:'get',
			url:"/attDelete",
			data:{"image":image},
			success:function(){
				alert("첨부파일 삭제 성공");
				img.remove();
			}
		})
	})
</script>
- 제품 상세 페이지에서 이미지를 업로드 하도록 하겠다.
/ex07/src/main/webapp/WEB-INF/views/read.jsp
....
	<div id="products">
		<c:forEach items="${attList}" var="image">
			<div>
				<img src="/display?fileName=${image}" width=150 /> <a
					href="${image}">삭제</a>
			</div>
		</c:forEach>
	</div>
</div>

<script>
	var pcode = "${vo.pcode}";
	   $("#file").on("change", function(e){
	      var file=$(this)[0].files[0];
	      if(file==null) return;
	      var formData = new FormData();

	      formData.append("file", file);
	      formData.append("pcode", pcode);
	      $.ajax({
	         type:"post",
	         url: "/attInsert",
	         data: formData,
	         processData:false,
	         contentType: false,
	         success: function(data){
	            var str="<div style='float:left;'>";
	            str += "<img src='/display?fileName=" + data + "' width=200/>";
	            str += "<a href='" + data + "'>삭제</a>";
	            str += "</div>";
	            $("#products").append(str);
	         }
	      });
	   });
....
/ex07/src/main/java/com/example/controller/ProductController.java
.....
	// 파일 저장 루트 지정
	@Resource(name = "uploadPath")
	private String path;

	// 첨부파일 입력
	@RequestMapping("/attInsert")
	@ResponseBody
	public String attInsert(String pcode, MultipartFile file) throws Exception {
		File folder = new File(path + "/" + pcode);
		if (!folder.exists()) {
			folder.mkdir();
		}
		String image = pcode + "/" + System.currentTimeMillis() + "_" + file.getOriginalFilename();
		file.transferTo(new File(path + "/" + image));
		adao.insert(image, pcode);
		return image;
	}
.....
'ICIA 수업일지' 카테고리의 다른 글
| 2021.10.15 수업일지(Spring Framework, Fileupload, interceptor) (0) | 2021.10.15 |
|---|---|
| 2021.10.14 수업일지(Spring Framework, Fileupload) (0) | 2021.10.14 |
| 2021.10.12 수업일지(Spring 연습, fileupload 방법 (0) | 2021.10.12 |
| 2021.10.08 수업일지(Spring Framework 연습) (0) | 2021.10.08 |
| 2021.10.07 수업일지(Spring Framework 연습) (0) | 2021.10.07 |


