- React.js
- 새로운 프로젝트를 만들어보겠다.
C:\data\react>yarn create react-app ex03
- 프로젝트 폴더로 이동
C:\data\react\ex03
- 프로젝트 시작
C:\data\react\ex03\yarn start
- C:\data\react\ex03\public\index.html -> html 시작 부분
- C:\data\react\ex03\src\index.js -> root 연결부 / App component render 연결부
- C:\data\react\ex03\src\App.css -> 웹 CSS부분
- C:\data\react\ex03\src\App.js -> 웹 선언부분

- C:\data\react\ex03\src\App.js
import './App.css';

// 컴포넌트
// 함수형(or 화살표형) 컴포넌트, 클래스형 컴포넌트
const App = () => {
  // jsx 문법을 이용해서 구성
  return (
    // jsx는 class가 아니라 className으로
    <div className="App">
      <h1>React</h1>
    </div>
  );
}

// 컴포넌트를 외부로 내보내서 import 시켜 사용한다.
// default인 경우에만 중가로를 생락할 수 있다.
export default App;
- 컴포넌트 작업을 할 폴더 생성
- C:\data\react\ex03\src\(new)component
- C:\data\react\ex03\src\component\(new)Address.js
import React from 'react';
import AddressList from './AddressList';

const Address = () => {
    return (
        <div>
            <h1>주소관리</h1>
            <AddressList/>
        </div>
    );
};

export default Address;
- C:\data\react\ex03\src\App.js
import Address from './component/Address';
...
  return (
    // jsx는 class가 아니라 className으로
    <div className="App">
      <Address/>
    </div>
  );
  ...
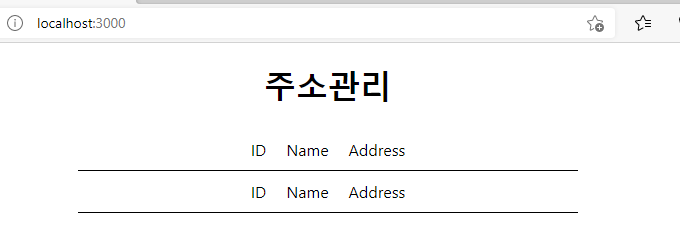
- C:\data\react\ex03\src\component\(new)AddressListItem.js
import React from 'react';

const AddressListItem = () => {
    const style = {
        // CarmelCase
        borderBottom:"1px solid black",
        padding:'10px'
    }
    return (
        // style 직접 {{}}
        <div style={style}>
            <span>ID</span>
            <span>Name</span>
            <span>Address</span>
        </div>
    );
};

export default AddressListItem;
- C:\data\react\ex03\src\component\(new)AddressList.js
import React from 'react';
import AddressListItem from './AddressListItem';

const AddressList = () => {
    return (
        <div style={{width:'500px',margin:'0px auto'}}>
            <AddressListItem/>
            <AddressListItem/>
            <AddressListItem/>
            <AddressListItem/>
        </div>
    );
};

export default AddressList;

- 데이터값을 출력해보도록 하겠다.
- C:\data\react\ex03\src\component\Address.js
import React, { useState } from 'react';
import AddressList from './AddressList';

const Address = () => {
    const [persons,setPersons] = useState([
        {id:1, name:'이주성', address:'서울시 관악구'},
        {id:2, name:'김철수', address:'강원도 원주시'},
    ])
    return (
        <div>
            <h1>주소관리</h1>
            <AddressList persons={persons}/>
        </div>
    );
};

export default Address;
- C:\data\react\ex03\src\component\AddressList.js
import React from 'react';
import AddressListItem from './AddressListItem';

const AddressList = ({persons}) => {
    return (
        <div style={{width:'500px',margin:'0px auto'}}>
            {persons.map(person=><AddressListItem key={person.id} person={person}/>)}
        </div>
    );
};

export default AddressList;
- C:\data\react\ex03\src\component\AddressListItem.js
import React from 'react';

//                      비구조 할당
const AddressListItem = ({person}) => {
    const style = {
        // CarmelCase
        borderBottom:"1px solid black",
        padding:'10px'
    }

    const {id, name, address} = person;

    return (
        // style 직접 {{}}
        <div style={style}>
            <span>{id}</span>
            <span>{name}</span>
            <span>{address}</span>
        </div>
    );
};

export default AddressListItem;

- 주소등록 컴포넌트를 만들자.
- C:\data\react\ex03\src\component\(new)AddressInsert.js
import React, { useState } from 'react';

const AddressInsert = () => {

    const [form, setForm] = useState({
        name:'황희',
        address:'경기도 파주시'
    })

    // 비구조 할당
    const{name, address} = form;

    // 고정되어 있는 벨류값을 바꿔줌
    const onChange =(e)=>{
        setForm({
            ...form,
            [e.target.name]:e.target.value
        })
    }

    return (
        <form>
            <div>
                <div><input type='text' placeholder='이름 입력' value={name}
                name='name' onChange={onChange}/>{name}</div>
                <div><input type='text' placeholder='주소 입력' value={address}
                name='address' onChange={onChange}/>{address}</div>
                <div><button>주소등록</button></div>
            </div>
        </form>
    );
};

export default AddressInsert;
- C:\data\react\ex03\src\component\Address.js
import React, { useState } from 'react';
import AddressInsert from './AddressInsert';
import AddressList from './AddressList';

const Address = () => {
...
    return (
        <div>
            <h1>주소관리</h1>
            <AddressInsert/>
            <hr/>
            <AddressList persons={persons}/>
        </div>
    );
};

export default Address;

- 주소 등록 버튼을 눌렀을때 데이터가 입력될 수 있게 하겠다.
- C:\data\react\ex03\src\component\Address.js
import React, { useState } from 'react';
import AddressInsert from './AddressInsert';
import AddressList from './AddressList';

const Address = () => {
    const [persons,setPersons] = useState([
        {id:1, name:'이주성', address:'서울시 관악구'},
        {id:2, name:'김철수', address:'강원도 원주시'},
        {id:3, name:'박영희', address:'제주시 서귀포구'},
    ])

    const [nextId,setNextId] = useState(4)

    const onInsert =(form) =>{
        const person = {
            id:nextId,
            name:form.name,
            address:form.address
        }
        // persons에 concat을 이용해 person을 연결해준다.
        setPersons(persons.concat(person));
        setNextId(nextId+1);
    }

    return (
        <div>
            <h1>주소관리</h1>
            <AddressInsert onInsert={onInsert}/>
            <hr/>
            <AddressList persons={persons}/>
        </div>
    );
};

export default Address;
- C:\data\react\ex03\src\component\AddressInsert.js
...

    const onSubmit = (e) =>{
        e.preventDefault();
        if(name==='' || address===''){
            alert('이름과 주소를 확인하세요.');
            return;
        }
        if(!window.confirm('등록하시겠습니까?')) return;
        onInsert(form);
        setForm({
            name:'',
            address:''
        })
    }

    return (
        <form onSubmit={onSubmit}>
            <div>
                <div><input type='text' placeholder='이름 입력' value={name}
                name='name' onChange={onChange}/>{name}</div>
                <div><input type='text' placeholder='주소 입력' value={address}
                name='address' onChange={onChange}/>{address}</div>
                <div><button>주소등록</button></div>
            </div>
        </form>
    );
};

export default AddressInsert;

- 삭제버튼으로 삭제해보도록 하겠다.
- C:\data\react\ex03\src\component\AddressListItem.js
import React from 'react';

//                      비구조 할당
const AddressListItem = ({person}) => {
    const style = {
        // CarmelCase
        borderBottom:"1px solid black",
        padding:'10px'
    }

    const {id, name, address} = person;

    return (
        // style 직접 {{}}
        <div style={style}>
            <span>{id}</span>
            <span>{name}</span>
            <span>{address}</span>
            <button>삭제</button>
        </div>
    );
};

export default AddressListItem;
- C:\data\react\ex03\src\component\Address.js
import React, { useState } from 'react';
import AddressInsert from './AddressInsert';
import AddressList from './AddressList';

const Address = () => {
    const [persons,setPersons] = useState([
        {id:1, name:'이주성', address:'서울시 관악구'},
        {id:2, name:'김철수', address:'강원도 원주시'},
        {id:3, name:'박영희', address:'제주시 서귀포구'},
    ])

    const [nextId,setNextId] = useState(4)

    const onInsert =(form) =>{
        const person = {
            id:nextId,
            name:form.name,
            address:form.address
        }
        // persons에 concat을 이용해 person을 연결해준다.
        setPersons(persons.concat(person));
        setNextId(nextId+1);
    }

    const onDelete = (id) => {
        setPersons(persons.filter(person=>person.id != id));
    }

    return (
        <div>
            <h1>주소관리</h1>
            <AddressInsert onInsert={onInsert}/>
            <hr/>
            <AddressList persons={persons} onDelete={onDelete}/>
        </div>
    );
};

export default Address;
- C:\data\react\ex03\src\component\AddressList.js
import React from 'react';
import AddressListItem from './AddressListItem';

const AddressList = ({persons, onDelete}) => {
    return (
        <div style={{width:'500px',margin:'0px auto'}}>
            {persons.map(person=><AddressListItem key={person.id} person={person} onDelete={onDelete}/>)}
        </div>
    );
};

export default AddressList;
- C:\data\react\ex03\src\component\AddressListItem.js
import React from 'react';

//                      비구조 할당
const AddressListItem = ({person, onDelete}) => {
    const style = {
        // CarmelCase
        borderBottom:"1px solid black",
        padding:'10px'
    }

    const {id, name, address} = person;

    const onClickDelete = (id) => {
        if(!window.confirm(`${id}을(를) 삭제하시겠습니까?`)) return;
    }

    return (
        // style 직접 {{}}
        <div style={style}>
            <span>{id}</span>
            <span>{name}</span>
            <span>{address}</span>
            <button onClick={()=>onClickDelete(id)}>삭제</button>
        </div>
    );
};

export default AddressListItem;
- C:\data\react\ex03\src\component\AddressListItem.js
import React from 'react';

//                      비구조 할당
const AddressListItem = ({person, onDelete}) => {
    const style = {
        // CarmelCase
        borderBottom:"1px solid black",
        padding:'10px'
    }

    const {id, name, address} = person;

    const onClickDelete = (id) => {
        if(!window.confirm(`${id}을(를) 삭제하시겠습니까?`)) return;
        onDelete(id);
    }

    return (
        // style 직접 {{}}
        <div style={style}>
            <span>{id}</span>
            <span>{name}</span>
            <span>{address}</span>
            <button onClick={()=>onClickDelete(id)}>삭제</button>
        </div>
    );
};

export default AddressListItem;

- json data를 웹에서 가지고와서 출력해보도록 하겠다.
- C:\data\react\ex03\src\App.js
import './App.css';
import Todo from './component/Todo';
...
const App = () => {
...
  return (
...
    <div className="App">
      <Todo/>
    </div>
  );
}

...
- C:\data\react\ex03\src\component\(new)Todo.js
import React from 'react';
import TodoList from './TodoList';

const Todo = () => {
    return (
        <div>
            <h1>일정관리</h1>
            <TodoList/>
        </div>
    );
};

export default Todo;
- C:\data\react\ex03\src\component\(new)TodoList.js
import React from 'react';
import TodoListItem from './TodoListItem';

const TodoList = () => {
    return (
        <div>
            <TodoListItem/>
            <TodoListItem/>
            <TodoListItem/>
        </div>
    );
};

export default TodoList;
- C:\data\react\ex03\src\component\TodoListItem.js
import React from 'react';

const TodoListItem = () => {
    return (
        <div>
            <div>할일</div>
        </div>
    );
};

export default TodoListItem;

- C:\data\react\ex03\src\component\Todo.js
import TodoList from "./TodoList";
import {useEffect, useState} from 'react';

const Todo = () => {

    const [todos, setTodos] = useState([]);

    const callAPI = () => {
        fetch('https://jsonplaceholder.typicode.com/todos')
        .then(res=>res.json())
        .then(json=>{
            setTodos(json.filter(todo => todo.id<=10));
        });
    }

    useEffect(()=>{
        callAPI();
    },[]);

    return(
        <div>
            <h1>할일목록</h1>
            <TodoList todos={todos}/>
        </div>
    )
}

export default Todo;
- C:\data\react\ex03\src\component\TodoList.js
import React from 'react';
import TodoListItem from './TodoListItem';

const TodoList = ({todos}) => {
    return (
        <div>
            {todos.map(todo=><TodoListItem key={todo.id} todo={todo}/>)}
        </div>
    );
};

export default TodoList;
- C:\data\react\ex03\src\component\TodoListItem.js
import React from 'react';

const TodoListItem = ({todo}) => {
    const {id, title, completed} = todo;
    return (
        <div style={{textAlign:'left',margin:'20px'}}>
            <div>{id} : {title}</div>
        </div>
    );
};

export default TodoListItem;

- 체크박스를 넣어보자.
- C:\data\react\ex03\src\component\TodoListItem.js
import React from 'react';

const TodoListItem = ({todo}) => {
    const {id, title, completed} = todo;
    return (
        <div style={{textAlign:'left',margin:'20px'}}>
            <div>
                <input type='checkbox' checked={completed}/>
                <span>{id}</span>
                <span>{title}</span>
            </div>
        </div>
    );
};

export default TodoListItem;

- react icon을 추가하고 일정추가 input을 넣어주도록 하겠다.
in terminal
ctrl + c
yes
C:\data\react\ex03>yarn add react-iconsC:\data\react\ex03>yarn start
- C:\data\react\ex03\src\component\(new)TodoInsert.js
import React, { useState } from 'react';

const TodoInsert = ({onInsert}) => {
    const [title, setTitle] = useState('리엑트 공부')
    const onSubmit = (e) =>{
        e.preventDefault();
        if(!window.confirm('등록하시겠습니까?')) return;
        onInsert(title);
        setTitle('');
    }
    return (
        <form onSubmit={onSubmit}>
            <input type="text" placeholder="일정을 입력하세요." size={80}
            value={title} onChange={(e) => setTitle(e.target.value)}/>
            <button>등록</button>
        </form>
    );
};

export default TodoInsert;
- C:\data\react\ex03\src\component\Todo.js
import TodoList from "./TodoList";
import {useEffect, useState} from 'react';
import TodoInsert from "./TodoInsert";

const Todo = () => {

    const [todos, setTodos] = useState([]);

    const [nextId,setNextId] = useState(11);

    const callAPI = () => {
        fetch('https://jsonplaceholder.typicode.com/todos')
        .then(res=>res.json())
        .then(json=>{
            setTodos(json.filter(todo => todo.id<=10));
        });
    }

    useEffect(()=>{
        callAPI();
    },[]);

    const onInsert = (title) =>{
        const todo = {
            id : nextId,
            title : title,
            completed:false
        }
        setTodos(todos.concat(todo))
        setNextId(nextId+1);
    }

    return(
        <div>
            <h1>일정관리</h1>
            <TodoInsert onInsert={onInsert}/>
            <TodoList todos={todos}/>
        </div>
    )
}

export default Todo;

- 삭제버튼을 만들어 삭제해보겠다.
- C:\data\react\ex03\src\component\Todo.js
import TodoList from "./TodoList";
import {useEffect, useState} from 'react';
import TodoInsert from "./TodoInsert";

const Todo = () => {

    const [todos, setTodos] = useState([]);

    const [nextId,setNextId] = useState(11);

    const callAPI = () => {
        fetch('https://jsonplaceholder.typicode.com/todos')
        .then(res=>res.json())
        .then(json=>{
            setTodos(json.filter(todo => todo.id<=10));
        });
    }

    useEffect(()=>{
        callAPI();
    },[]);

    const onInsert = (title) =>{
        const todo = {
            id : nextId,
            title : title,
            completed:false
        }
        setTodos(todos.concat(todo))
        setNextId(nextId+1);
    }

    const onDelete = (id) => {
        setTodos(todos.filter(todo=>todo.id != id));
    }
    return(
        <div>
            <h1>일정관리</h1>
            <TodoInsert onInsert={onInsert}/>
            <TodoList todos={todos} onDelete={onDelete}/>
        </div>
    )
}

export default Todo;
- C:\data\react\ex03\src\component\TodoList.js
import React from 'react';
import TodoListItem from './TodoListItem';

const TodoList = ({todos, onDelete}) => {
    return (
        <div>
            {todos.map(todo=><TodoListItem key={todo.id} todo={todo} onDelete={onDelete}/>)}
        </div>
    );
};

export default TodoList;
- C:\data\react\ex03\src\component\TodoListItem.js
import React from 'react';
import {MdRemoveCircleOutline} from 'react-icons/md';

const TodoListItem = ({todo,onDelete}) => {
    const {id, title, completed} = todo;
    const onClickDelete =(id) =>{
        if(!window.confirm(`${id}을(를) 삭제하시겠습니까?`)) return;
        onDelete(id);
    }
    return (
        <div style={{textAlign:'left',margin:'20px'}}>
            <div>
                <input type='checkbox' checked={completed}/>
                <span>{id}</span>
                <span>{title}</span>
                <span style={{color:'red', cursor:'pointer'}} onClick={()=>onClickDelete(id)}><MdRemoveCircleOutline/></span>
            </div>
        </div>
    );
};

export default TodoListItem;

- 체크박스 토글해보도록 하겠다.
- C:\data\react\ex03\src\component\Todo.js
import TodoList from "./TodoList";
import {useEffect, useState} from 'react';
import TodoInsert from "./TodoInsert";

const Todo = () => {

    const [todos, setTodos] = useState([]);

    const [nextId,setNextId] = useState(11);

    const callAPI = () => {
        fetch('https://jsonplaceholder.typicode.com/todos')
        .then(res=>res.json())
        .then(json=>{
            setTodos(json.filter(todo => todo.id<=10));
        });
    }

    useEffect(()=>{
        callAPI();
    },[]);

    const onInsert = (title) =>{
        const todo = {
            id : nextId,
            title : title,
            completed:false
        }
        setTodos(todos.concat(todo))
        setNextId(nextId+1);
    }

    const onDelete = (id) => {
        setTodos(todos.filter(todo=>todo.id != id));
    }

    const onToggle = (id) => {
        setTodos(todos.map(todo => todo.id===id? {...todo ,completed:!todo.completed} : todo))
    }
    return(
        <div>
            <h1>일정관리</h1>
            <TodoInsert onInsert={onInsert}/>
            <TodoList todos={todos} onDelete={onDelete} onToggle={onToggle}/>
        </div>
    )
}

export default Todo;
- C:\data\react\ex03\src\component\TodoList.js
import React from 'react';
import TodoListItem from './TodoListItem';

const TodoList = ({todos, onDelete, onToggle}) => {
    return (
        <div>
            {todos.map(todo=><TodoListItem key={todo.id} todo={todo} onDelete={onDelete} onToggle={onToggle}/>)}
        </div>
    );
};

export default TodoList;
- C:\data\react\ex03\src\component\TodoListItem.js
import React from 'react';
import {MdRemoveCircleOutline} from 'react-icons/md';

const TodoListItem = ({todo,onDelete,onToggle}) => {
    const {id, title, completed} = todo;
    const onClickDelete =(id) =>{
        if(!window.confirm(`${id}을(를) 삭제하시겠습니까?`)) return;
        onDelete(id);
    }

    const onClickCheckbox =(id) => {
        onToggle(id);
    }

    return (
        <div style={{textAlign:'left',margin:'20px'}}>
            <div>
                <input type='checkbox' checked={completed} onClick={()=>onClickCheckbox(id)}/>
                <span>{id}</span>
                <span>{title}</span>
                <span style={{color:'red', cursor:'pointer'}} onClick={()=>onClickDelete(id)}><MdRemoveCircleOutline/></span>
            </div>
        </div>
    );
};

export default TodoListItem;

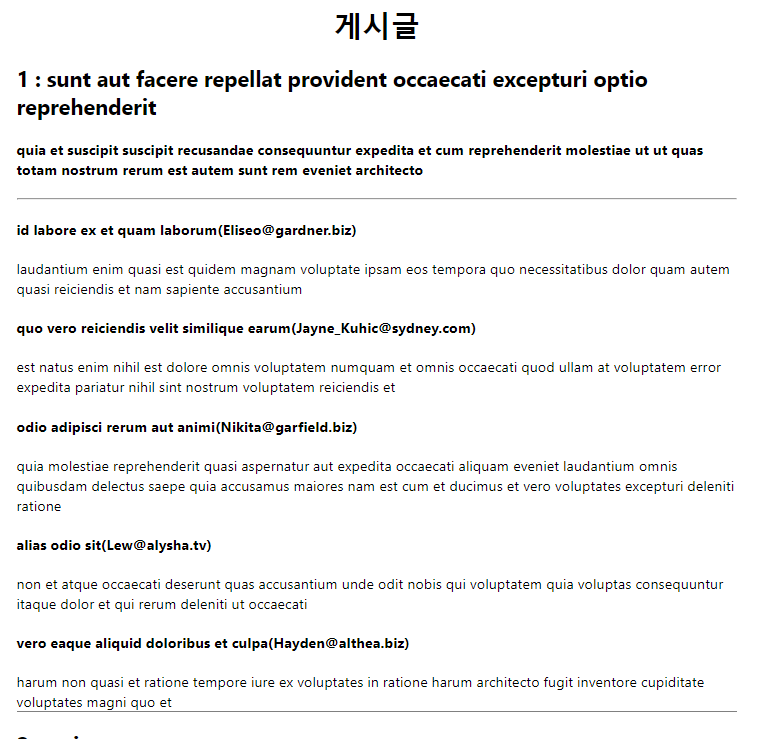
- json /posts 를 출력해보도록 하겠다.
https://jsonplaceholder.typicode.com/posts
- C:\data\react\ex03\src\component\(new)Posts.js
import React from 'react';
import PostList from './PostList';

const Posts = () => {
    return (
        <div className="posts">
            <h1>게시글</h1>
            <PostList/>
        </div>
    );
};

export default Posts;
- C:\data\react\ex03\src\component\(new)PostList.js
import React from 'react';
import PostListItem from './PostListItem';

const PostList = () => {
    return (
        <div className="list">
            <PostListItem/>
            <PostListItem/>
            <PostListItem/>
        </div>
    );
};

export default PostList;
- C:\data\react\ex03\src\component\(new)PostListItem.js
import React from 'react';

const PostListItem = () => {
    return (
        <div className="item">
            <div><h2>제목</h2></div>
            <div><h4>내용</h4></div>
        </div>
    );
};

export default PostListItem;
- C:\data\react\ex03\src\App.css
.posts h1 {
  text-align: center;
}

.posts{
  width: 800px;
  text-align: left;
  margin: 0px auto;
}

.item {
  width: 800px;
  border-bottom: 1px solid gray;
}

- 이제 웹 json 데이터를 가지고 오는 메서드를 만들겠다.
- C:\data\react\ex03\src\component\Posts.js
import React, { useEffect, useState } from 'react';
import PostList from './PostList';

const Posts = () => {
    const [posts,setPosts] = useState([]);

    const callAPI=()=>{
        fetch('https://jsonplaceholder.typicode.com/posts')
        .then(res=>res.json())
        .then(json => {
            setPosts(json);
        })
    }

    useEffect(()=>{
        callAPI();
    },[])

    return (
        <div className="posts">
            <h1>게시글</h1>
            <PostList posts={posts}/>
        </div>
    );
};

export default Posts;
- C:\data\react\ex03\src\component\PostList.js
import React from 'react';
import PostListItem from './PostListItem';

const PostList = ({posts}) => {
    return (
        <div className="list">
            {posts.map(post=><PostListItem key={post.id} post={post}/>)}
        </div>
    );
};

export default PostList;
- C:\data\react\ex03\src\component\PostListItem.js
import React from 'react';

const PostListItem = ({post}) => {
    // 비구조 할당
    const {id,title,body} = post
    return (
        <div className="item">
            <div><h2>{id} : {title}</h2></div>
            <div><h4>{body}</h4></div>
        </div>
    );
};

export default PostListItem;

- 만약 열개만 가지고 오고 싶다면
- C:\data\react\ex03\src\component\Posts.js
    const callAPI=()=>{
        fetch('https://jsonplaceholder.typicode.com/posts')
        .then(res=>res.json())
        .then(json => {
            setPosts(json.filter(post=>post.id<=10));
        })
    }

- 이전 다음 버튼 및 페이지를 표시해주는 div tag를 만들어보겠다.
- C:\data\react\ex03\src\component\Posts.js
...

const Posts = () => {
...

    return (
        <div className="posts">
            <h1>게시글</h1>
            <PostList posts={posts}/>
            <div className="pagination">
                <button>이전</button>
                <span>1/2</span>
                <button>다음</button>
            </div>
        </div>
    );
};

export default Posts;
- C:\data\react\ex03\src\App.css
.pagination{
text-align: center;
padding:10px;
}

.pagination button {
  background-color: indianred;
  color: white;
  margin: 0px 10px 0px 10px;
  padding: 10px;
  border-radius: 5px 5px 5px 5px;
  font-size: 20px;
}

- 첫페이지 마지막 페이지 설정
- 첫페이지 마지막 페이지에서 이전 이후 버튼 disabled
- 페이지를 넘길때마가 데이터도 바뀌게
C:\data\react\ex03\src\component\Posts.js
import React, { useEffect, useState } from 'react';
import PostList from './PostList';
const Posts = () => {
const [posts,setPosts] = useState([]);
const [page,setPage] = useState(1);
const lastPage = Math.ceil(100/10)
const callAPI=()=>{
fetch('https://jsonplaceholder.typicode.com/posts')
.then(res=>res.json())
.then(json => {
setPosts(json.filter(post=>post.id>=(page-1)*10+1 && post.id<=(page*10)));
})
}
useEffect(()=>{
callAPI();
},[page])
return (
<div className="posts">
<h1>게시글</h1>
<PostList posts={posts}/>
<div className="pagination">
<button onClick={()=>setPage(page-1)} disabled={page===1?true:false}><</button>
<span>{page}/{lastPage}</span>
<button onClick={()=>setPage(page+1)} disabled={page===lastPage?true:false}>></button>
</div>
</div>
);
};
export default Posts;

- 제목에 호버링시 코멘트가 보이도록 하겠다.
- C:\data\react\ex03\src\component\(new)Comments.js
import {useState, useEffect} from 'react';

const Comments = ({postid}) => {
    const [comments, setComments] = useState([]);

    const callAPI = () =>{
        fetch(`https://jsonplaceholder.typicode.com/comments?postId=${postid}`)
        .then(res => res.json())
        .then(json => setComments(json));
    }

    useEffect(()=>{
        callAPI();
    },[]);

    return(
        <div>
            <hr/>
            {comments.map(comment=>
                <div key={comment.id}>
                    <div><h4>{comment.name}({comment.email})</h4></div>
                    <div>{comment.body}</div>
                </div>
            )}
        </div>
    )
}

export default Comments;
- 새로운 프로젝트를 생성하자.
- 고객관리 웹 페이지를 만들어보겠다.
- 백엔드 작업까지 해보겠다.
// 터미널 진입
ctrl + `
// 서버 종료
ctrl + c
y
// 한단계 위 폴더로 올리기
cd..// 프로젝트 생성
yarn create react-app ex04// 프로젝트 폴더 진입
cd ex04
// 프로젝트 스타트
yarn start
- 파일관리자에서 [ex04]폴더에서 [client] 폴더를 생성한 후 [ex04] 프로젝트의 모든 파일을 [client] 폴더로 이동시킨다.
- [client] 폴더 안에 [.gitignore] 파일을 [ex04] 프로젝트 안에 복사한다.
- [ex04] 폴더에서 웹서버 구동을 위한 nodemon을 설치하면 [ex04]-[node_modules] 폴더가 생성된다.
npm install -g nodemon
- [ex04] 프로젝트의 폴더에 [package.json] 파일을 생성한 후 아래 내용을 작성한다.
- C:\data\react\ex04\(new)package.json
{
    "name": "management",
    "version": "1.0.0",
    "private": true,
    "scripts": {
        "client": "cd client && yarn start",
        "server": "nodemon server.js",
        "dev": "concurrently --kill-others-on-fail \"yarn server\" \"yarn client\""
    }
}
- [ex04]폴더에서 웹서버를 구축하기 위한 express와 서버와 클라이언트를 동시에 실행하기 위한 concurrently를 아래와 같이 설치한다.
npm install express concurrently
- 설치 후 C:\data\react\ex04\package.json에 아래와 같이 concurrently가 생성되었다.
{
    "name": "management",
    "version": "1.0.0",
    "private": true,
    "scripts": {
        "client": "cd client && yarn start",
        "server": "nodemon server.js",
        "dev": "concurrently --kill-others-on-fail \"yarn server\" \"yarn client\""
    },
    "dependencies": {
        "concurrently": "^6.2.1",
        "express": "^4.17.1"
    }
}
- 웹서버 구축을 위한 server.js 파일을 아래와 같이 작성한다.
- C:\data\react\ex04\(new)server.js
const express = require('express');
const app = express();
const port = process.env.PORT || 5000;
app.use(express.json());
app.listen(port, () => {
    console.log(`server is listening at localhost:${port}`);
});
app.get('/', (req, res) => {
    res.send({
        success: true
    })
});
- 웹서버와 클라이언트 서버를 동시에 실행을 위해 아래 명령어를 입력해 본다.
C:\data\react\ex04>yarn dev


- 백엔드 관련은 ex04, 프론트 관련은 client에서 하겠다.
- C:\data\react\ex04\client\src\(new)components
- C:\data\react\ex04\client\src\components\(new)Customer.js
import React from 'react';
import CustomerList from './CustomerList';

const Customer = () => {
    return (
        <div>
            <h1>고객관리시스템</h1>
            <CustomerList/>
        </div>
    );
};

export default Customer;
- C:\data\react\ex04\client\src\components\(new)CustomerList.js
import React from 'react';
import CustomerItem from './CustomerItem';

const CustomerList = () => {
    return (
        <div>
            <CustomerItem/>
            <CustomerItem/>
            <CustomerItem/>
        </div>
    );
};

export default CustomerList;
- C:\data\react\ex04\client\src\components\(new)CustomerItem.js
import React from 'react';

const CustomerItem = () => {
    return (
        <div>
            <span>번호</span>
            <span>프로필이미지</span>
            <span>이름</span>
            <span>생년월일</span>
            <span>성별</span>
            <span>직업</span>
        </div>
    );
};

export default CustomerItem;

- 백엔드 작업으로 고객목록을 출력해보도록 하겠다.
- C:\data\react\ex04\server.js
// 고객목록출력
app.get('/api/customers', (req,res)=>{
    res.send([
        { id: 1, image:'https://placeimg.com/64/64/1', name:'홍길동', birthday:'961222', gender:'남자', job:'대학생' },
        { id: 2, image:'https://placeimg.com/64/64/2', name:'심청이', birthday:'960506', gender:'여자', job:'회사원' },
        { id: 3, image:'https://placeimg.com/64/64/3', name:'강감찬', birthday:'861202', gender:'남자', job:'프로그래머'},
     ]);
});

- 서버에서 데이터를 가지고 오도록 하겠다.
- C:\data\react\ex04\client\src\components\Customer.js
import React, { useEffect, useState } from 'react';
import CustomerList from './CustomerList';

const Customer = () => {
    const [customers,setCustomers] = useState([]);

    const callAPI=()=>{
        fetch('/api/customers')
        .then(res=>res.json())
        .then(json=>{
            setCustomers(json);
        })
    }

    // ,[] 한번만 호출하려면 빈배열을 추가한다.
    useEffect(()=>{
        callAPI();
    },[])

    return (
        <div>
            <h1>고객관리시스템</h1>
            <CustomerList customers={customers}/>
        </div>
    );
};

export default Customer;
- C:\data\react\ex04\client\src\components\CustomerList.js
import React from 'react';
import CustomerItem from './CustomerItem';

const CustomerList = ({customers}) => {
    return (
        <div>
            {customers.map(customer=><CustomerItem key={customer.id} customer={customer}/>)}
        </div>
    );
};

export default CustomerList;
- C:\data\react\ex04\client\src\components\CustomerItem.js
import React from 'react';

const CustomerItem = ({customer}) => {
    const {id, image, name, birthday, gender, job} = customer
    return (
        <div>
            <span>{id}</span>
            <span><img src={image}/></span>
            <span>{name}</span>
            <span>{birthday}</span>
            <span>{gender}</span>
            <span>{job}</span>
        </div>
    );
};

export default CustomerItem;
- C:\data\react\ex04\client\package.json
- 추가
{
...
  },
  "proxy": "http://localhost:5000/"
}
- C:\data\react\ex04\client\src\App.css
.App{
  background-color: white;
}
.customer{
  width: 800px;
  margin: 0px auto;
  background-color: rgb(153, 194, 255);
  padding: 10px;
}
.list{
  padding: 10px;
  margin-bottom: 10px;
  background-color: rgb(255, 255, 255);
}
.item{
  background-color: rgb(230, 240, 255);
  margin-bottom: 10px;
  padding: 10px;
  text-align: left;
}
.item span{
  padding:0px 30px 0px 30px;
}

- 이번에는 테이블을 생성해서 넣어보겠다.
- workbench
create table customers(
 id int primary key auto_increment,
 image varchar(1024),
 name varchar(64),
 birthday varchar(64),
 gender varchar(64),
 job varchar(64)
);
insert into customers(image,name,birthday,gender,job) values('https://placeimg.com/64/64/1','홍길동','961222','남자','대학생');
insert into customers(image,name,birthday,gender,job) values('https://placeimg.com/64/64/2','심청이','960509','여자','회사원');
insert into customers(image,name,birthday,gender,job) values('https://placeimg.com/64/64/3','강감찬','861202','남자','의사');
- mysql을 연결해주도로고 하겠다.
- yarn을 종료하고 터미널에 다음 커맨드를 입력한다.
C:\data\react\ex04>yarn add mysql
- 설치 후
C:\data\react\ex04>yarn dev
- C:\data\react\ex04\package.json
{
    "name": "management",
    "version": "1.0.0",
    "private": true,
    "scripts": {
        "client": "cd client && yarn start",
        "server": "nodemon server.js",
        "dev": "concurrently --kill-others-on-fail \"yarn server\" \"yarn client\""
    },
    "dependencies": {
        "concurrently": "^6.2.1",
        "express": "^4.17.1",
        "mysql": "^2.18.1" // 확인
    }
}
- C:\data\react\ex04\server.js
const express = require('express');
const app = express();
const port = process.env.PORT || 5000;
const mysql = require('mysql');

const connection = mysql.createConnection({
    host: "localhost",
    user: "shop",
    password: "pass",
    port: "3306",
    database: "shopdb"
});

app.use(express.json());
app.listen(port, () => {
    console.log(`server is listening at localhost:${port}`);
});
app.get('/', (req, res) => {
    res.send({
        success: true
    })
});

// 고객목록출력
app.get('/api/customers', (req, res) => {
    var sql = "select * from customers order by id desc";
    connection.query(sql,(err,rows) => {
        res.send(rows);
    })
});

'ICIA 수업일지' 카테고리의 다른 글
| 2021.09.15 수업일지(React.js) (5) | 2021.09.15 |
|---|---|
| 2021.09.14 수업일지(React.js) (0) | 2021.09.14 |
| 2021.09.10 수업일지(React.js) (0) | 2021.09.10 |
| 2021.09.09 수업일지(간이발표, VSC, React) (0) | 2021.09.09 |
| 2021.09.08 수업일지(Spring, Servlet, JSTL) (0) | 2021.09.08 |


